 IQKeyboardManager
Codeless drop-in universal library allows to prevent issues of keyboard sliding up and cover UITextField/UITextView. Neither need to write any code nor any setup required and much more.
Top Related Projects

Swift image slideshow with circular scrolling, timer and full screen viewer

Reactive Keyboard in iOS

⛔️**DEPRECATED** ⛔️ A drop-in UIViewController subclass with a growing text input view and other useful messaging features

A collection of iOS components.

Create amazing custom iOS keyboards with Swift & SwiftUI.

A drop-in universal solution for moving text fields out of the way of the keyboard in iOS
Quick Overview
IQKeyboardManager is an iOS library that prevents issues of keyboard sliding up and covering UITextField/UITextView. It also manages the navigation between UITextFields/UITextViews and adds toolbar buttons to move between them. This library provides an automatic way to handle keyboard interactions without requiring you to write any code.
Pros
- Easy to implement with minimal setup required
- Automatically handles keyboard appearance and dismissal
- Provides smooth scrolling and text field focus management
- Supports both Objective-C and Swift projects
Cons
- May conflict with custom keyboard handling implementations
- Some users report occasional glitches or unexpected behavior
- Can add unnecessary overhead for projects with simple keyboard requirements
- Limited customization options for complex scenarios
Code Examples
- Basic setup in AppDelegate:
import IQKeyboardManagerSwift

@UIApplicationMain
class AppDelegate: UIResponder, UIApplicationDelegate {
    func application(_ application: UIApplication, didFinishLaunchingWithOptions launchOptions: [UIApplication.LaunchOptionsKey: Any]?) -> Bool {
        IQKeyboardManager.shared.enable = true
        return true
    }
}
- Customizing toolbar appearance:
IQKeyboardManager.shared.enableAutoToolbar = true
IQKeyboardManager.shared.toolbarTintColor = .blue
IQKeyboardManager.shared.toolbarBarTintColor = .lightGray
- Excluding specific view controllers:
class MyViewController: UIViewController {
    override func viewDidLoad() {
        super.viewDidLoad()
        IQKeyboardManager.shared.disabledDistanceHandlingClasses.append(MyViewController.self)
    }
}
Getting Started
- Install IQKeyboardManager using CocoaPods by adding the following to your Podfile:
pod 'IQKeyboardManager'
-
Run
pod installin your terminal. -
Import the library in your AppDelegate:
import IQKeyboardManagerSwift
- Enable IQKeyboardManager in your AppDelegate's
application(_:didFinishLaunchingWithOptions:)method:
IQKeyboardManager.shared.enable = true
That's it! IQKeyboardManager will now automatically handle keyboard interactions in your app.
Competitor Comparisons
Swift image slideshow with circular scrolling, timer and full screen viewer
Pros of ImageSlideshow
- Focused on image presentation and slideshow functionality
- Supports various image sources (local, URL, custom)
- Customizable transitions and animations
Cons of ImageSlideshow
- Limited to image handling, not a general-purpose UI component
- May require additional setup for complex image loading scenarios
- Less frequent updates and smaller community compared to IQKeyboardManager
Code Comparison
ImageSlideshow:
let slideshow = ImageSlideshow(frame: CGRect(x: 0, y: 0, width: 300, height: 200))
slideshow.setImageInputs([
    ImageSource(image: UIImage(named: "myImage"))!,
    AlamofireSource(urlString: "https://example.com/image.jpg")!
])
view.addSubview(slideshow)
IQKeyboardManager:
IQKeyboardManager.shared.enable = true
IQKeyboardManager.shared.enableAutoToolbar = false
IQKeyboardManager.shared.keyboardDistanceFromTextField = 10
While both libraries aim to improve iOS app development, they serve different purposes. ImageSlideshow focuses on creating image slideshows with various sources and transitions, while IQKeyboardManager handles keyboard interactions and text field management. The code examples demonstrate their distinct functionalities, with ImageSlideshow setting up an image slideshow and IQKeyboardManager configuring keyboard behavior globally.
Reactive Keyboard in iOS
Pros of RxKeyboard
- Integrates seamlessly with RxSwift, allowing for reactive programming patterns
- Provides more granular control over keyboard events and states
- Lightweight and focused specifically on keyboard management
Cons of RxKeyboard
- Requires knowledge of RxSwift, which may have a steeper learning curve
- Less comprehensive in features compared to IQKeyboardManager
- May require more manual setup and configuration
Code Comparison
RxKeyboard:
RxKeyboard.instance.visibleHeight
    .drive(onNext: { [weak self] keyboardVisibleHeight in
        self?.tableView.contentInset.bottom = keyboardVisibleHeight
    })
    .disposed(by: disposeBag)
IQKeyboardManager:
IQKeyboardManager.shared.enable = true
IQKeyboardManager.shared.enableAutoToolbar = false
IQKeyboardManager.shared.shouldResignOnTouchOutside = true
RxKeyboard offers a more reactive approach, allowing developers to respond to keyboard events using RxSwift's observable streams. This can lead to more flexible and composable code. IQKeyboardManager, on the other hand, provides a simpler setup with fewer lines of code, making it easier to implement basic keyboard management functionality.
While RxKeyboard excels in scenarios where fine-grained control and reactive programming are desired, IQKeyboardManager offers a more comprehensive set of features out-of-the-box, making it suitable for a wider range of use cases with minimal configuration.
⛔️**DEPRECATED** ⛔️ A drop-in UIViewController subclass with a growing text input view and other useful messaging features
Pros of SlackTextViewController
- More comprehensive UI components, including a customizable text input toolbar
- Built-in support for auto-growing text views and message composition
- Includes features like autocomplete and @mentioning out of the box
Cons of SlackTextViewController
- Larger and more complex, potentially harder to integrate for simple use cases
- Less focused on keyboard management specifically
- May require more customization to fit non-messaging apps
Code Comparison
SlackTextViewController:
let textView = SLKTextView()
textView.placeholder = "Message"
textView.placeholderColor = .lightGray
textView.pastableMediaTypes = [.image, .movie, .url]
IQKeyboardManager:
IQKeyboardManager.shared.enable = true
IQKeyboardManager.shared.enableAutoToolbar = false
IQKeyboardManager.shared.keyboardDistanceFromTextField = 10
SlackTextViewController provides a rich text input experience with built-in features for messaging apps, while IQKeyboardManager focuses solely on managing keyboard interactions across the entire app. SlackTextViewController requires more setup but offers more functionality out of the box, whereas IQKeyboardManager is simpler to implement and works automatically with minimal configuration. The choice between the two depends on the specific needs of your app, with SlackTextViewController being more suitable for complex messaging interfaces and IQKeyboardManager for general keyboard management across various app types.
A collection of iOS components.
Pros of YYKit
- Comprehensive collection of iOS development tools and utilities
- High-performance image and text rendering capabilities
- Extensive caching mechanisms for improved app performance
Cons of YYKit
- Larger codebase and potential overhead for projects not utilizing all features
- Steeper learning curve due to the wide range of functionalities
- Less frequent updates compared to IQKeyboardManager
Code Comparison
YYKit (Image loading and caching):
UIImageView *imageView = [UIImageView new];
[imageView yy_setImageWithURL:[NSURL URLWithString:@"http://example.com/image.jpg"]
                 placeholder:[UIImage imageNamed:@"placeholder.png"]];
IQKeyboardManager (Keyboard handling):
IQKeyboardManager.shared.enable = true
IQKeyboardManager.shared.enableAutoToolbar = false
IQKeyboardManager.shared.shouldResignOnTouchOutside = true
While both libraries serve different purposes, YYKit offers a broader range of functionalities for iOS development, including image handling, text rendering, and caching. IQKeyboardManager, on the other hand, focuses specifically on managing keyboard interactions and provides a simpler, more targeted solution for keyboard-related issues in iOS apps.
Create amazing custom iOS keyboards with Swift & SwiftUI.
Pros of KeyboardKit
- More comprehensive keyboard customization options
- Supports custom input views and keyboard extensions
- Offers a SwiftUI-friendly API
Cons of KeyboardKit
- Steeper learning curve due to more complex API
- Requires more setup and configuration for basic use cases
- May be overkill for simple keyboard management needs
Code Comparison
IQKeyboardManager:
import IQKeyboardManagerSwift

IQKeyboardManager.shared.enable = true
IQKeyboardManager.shared.enableAutoToolbar = false
KeyboardKit:
import KeyboardKit

struct ContentView: View {
    @StateObject var keyboardHandler = KeyboardInputViewController()

    var body: some View {
        TextField("Enter text", text: .constant(""))
            .keyboardType(.default)
            .autocapitalization(.none)
            .disableAutocorrection(true)
            .keyboardAppearance(.dark)
    }
}
Summary
IQKeyboardManager is simpler to implement and ideal for basic keyboard management, while KeyboardKit offers more advanced customization options and SwiftUI integration. IQKeyboardManager is better suited for quick implementations, whereas KeyboardKit shines in projects requiring extensive keyboard customization and control.
A drop-in universal solution for moving text fields out of the way of the keyboard in iOS
Pros of TPKeyboardAvoiding
- Lightweight and simple implementation
- Easy to integrate with existing projects
- Minimal setup required for basic functionality
Cons of TPKeyboardAvoiding
- Limited customization options
- Lacks advanced features like keyboard appearance prediction
- May require additional code for complex layouts or edge cases
Code Comparison
TPKeyboardAvoiding:
scrollView.contentInset = UIEdgeInsets(top: 0, left: 0, bottom: keyboardHeight, right: 0)
scrollView.scrollIndicatorInsets = scrollView.contentInset
IQKeyboardManager:
IQKeyboardManager.shared.enable = true
IQKeyboardManager.shared.enableAutoToolbar = false
IQKeyboardManager.shared.keyboardDistanceFromTextField = 10
TPKeyboardAvoiding offers a more manual approach, requiring developers to handle content inset adjustments. IQKeyboardManager provides a more automated solution with additional configuration options.
TPKeyboardAvoiding is suitable for simpler projects or when fine-grained control is needed. IQKeyboardManager excels in complex applications with multiple input fields and diverse layouts, offering a more comprehensive keyboard management solution out of the box.
Convert  designs to code with AI

Introducing Visual Copilot: A new AI model to turn Figma designs to high quality code using your components.
Try Visual CopilotREADME


![]()


IQKeyboardManager Objective-C version source code is moved to https://github.com/hackiftekhar/IQKeyboardManagerObjC
Introduction
While developing iOS apps, we often run into issues where the iPhone keyboard slides up and covers the UITextField/UITextView. IQKeyboardManager allows you to prevent this issue of keyboard sliding up and covering UITextField/UITextView without needing you to write any code or make any additional setup. To use IQKeyboardManager you simply need to add source files to your project.
Key Features
- One Line of Code - Just enable and it works
- Works Automatically - No manual setup required
- No More UIScrollView - Automatically handles scroll views
- No More Subclasses - Works with standard UIKit components
- No More Manual Work - Handles all edge cases automatically
- Modular Architecture - Include only what you need via subspecs
What's Included
- â Automatic keyboard avoidance for UITextField/UITextView
- â Support for UIScrollView, UITableView, UICollectionView
- â All interface orientations
- â Configurable keyboard distance
- â Class-level enable/disable control
Optional Features (via Subspecs)
- ð¦ Toolbar with Previous/Next/Done buttons
- ð¦ Return key handling customization
- ð¦ Tap-to-resign keyboard
- ð¦ Keyboard appearance configuration
- ð¦ UITextView with placeholder supportv
Subspecs
Now IQKeyboardManagerSwift uses a modular architecture with subspecs. By default, all subspecs are included, but you can include only what you need:
Available Subspecs
- Core (always included): Basic keyboard distance management
- Appearance: Keyboard appearance configuration
- IQKeyboardReturnManager: Return key handling
- IQKeyboardToolbarManager: Toolbar functionality (Previous/Next/Done buttons)
- IQTextView: UITextView with placeholder support
- Resign: Tap-to-resign keyboard functionality
Including Specific Subspecs
# Include toolbar example
pod 'IQKeyboardManagerSwift/IQKeyboardToolbarManager'
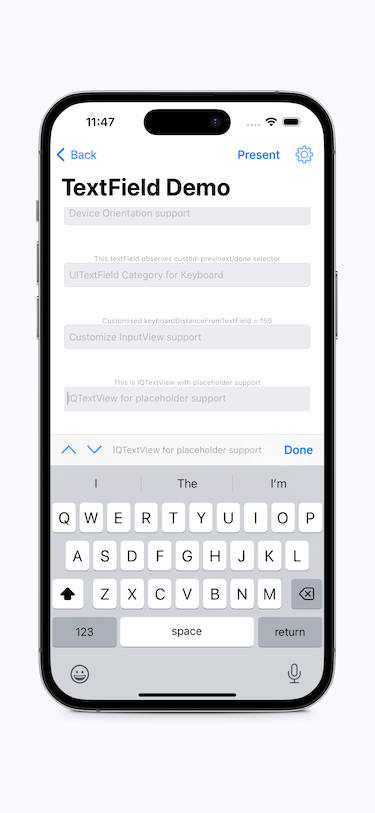
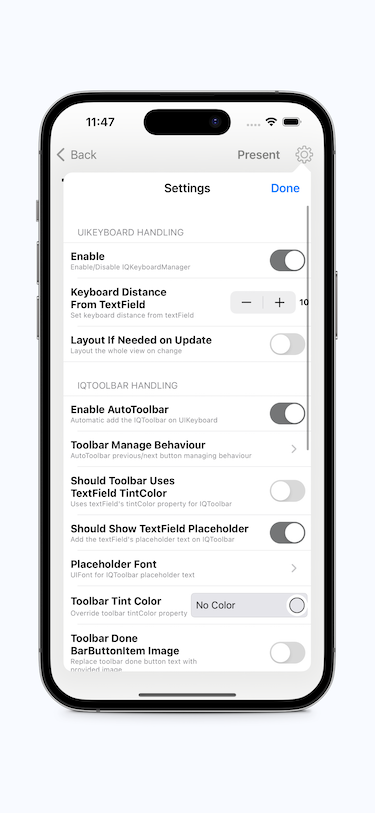
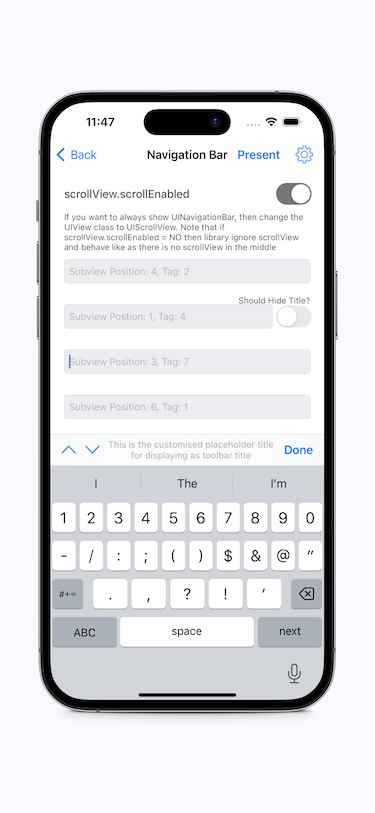
Screenshot
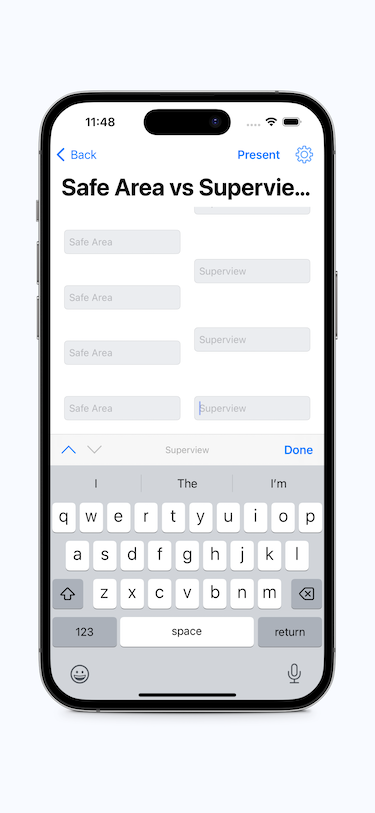
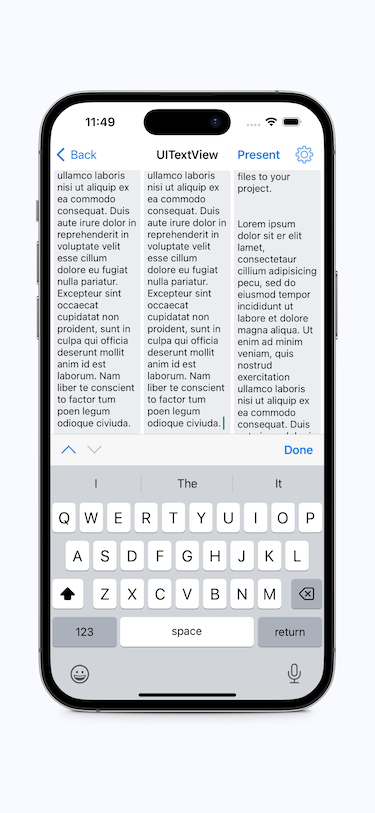
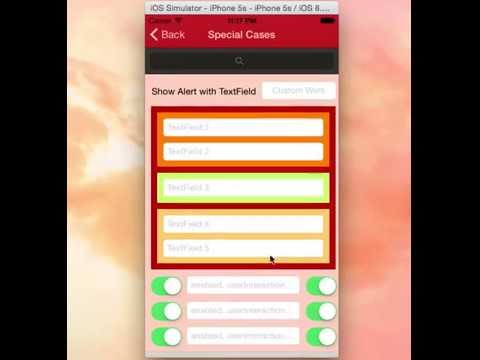
GIF animation
Video
Tutorial video by @rebeloper (#1135)
@rebeloper demonstrated two videos on how to implement IQKeyboardManager at it's core:

https://www.youtube.com/playlist?list=PL_csAAO9PQ8aTL87XnueOXi3RpWE2m_8v
Warning
- If you're planning to build SDK/library/framework and want to handle UITextField/UITextView with IQKeyboardManager then you're totally going the wrong way. I would never suggest to add IQKeyboardManager as dependency/adding/shipping with any third-party library. Instead of adding IQKeyboardManager you should implement your own solution to achieve same kind of results. IQKeyboardManager is totally designed for projects to help developers for their convenience, it's not designed for adding/dependency/shipping with any third-party library, because doing this could block adoption by other developers for their projects as well (who are not using IQKeyboardManager and have implemented their custom solution to handle UITextField/UITextView in the project).
- If IQKeyboardManager conflicts with other third-party library, then it's developer responsibility to enable/disable IQKeyboardManager when presenting/dismissing third-party library UI. Third-party libraries are not responsible to handle IQKeyboardManager.
Requirements
| Minimum iOS Target | Minimum Xcode Version | |
|---|---|---|
| IQKeyboardManagerSwift | iOS 13.0 | Xcode 13 |
| Demo Project | Xcode 15 |
Swift versions support
| Swift | Xcode | IQKeyboardManagerSwift |
|---|---|---|
| 5.9, 5.8, 5.7 | 16 | >= 7.0.0 |
| 5.9, 5.8, 5.7, 5.6 | 15 | >= 7.0.0 |
| 5.5, 5.4, 5.3, 5.2, 5.1, 5.0, 4.2 | 11 | >= 6.5.7 |
| 5.1, 5.0, 4.2, 4.0, 3.2, 3.0 | 11 | >= 6.5.0 |
| 5.0,4.2, 4.0, 3.2, 3.0 | 10.2 | >= 6.2.1 |
| 4.2, 4.0, 3.2, 3.0 | 10.0 | >= 6.0.4 |
| 4.0, 3.2, 3.0 | 9.0 | 5.0.0 |
Installation
CocoaPods
To install it, simply add the following line to your Podfile: (#236)
pod 'IQKeyboardManagerSwift'
Or you can choose the version you need based on Swift support table from Requirements
pod 'IQKeyboardManagerSwift', '8.0.0'
Carthage
To integrate IQKeyboardManger or IQKeyboardManagerSwift into your Xcode project using Carthage, add the following line to your Cartfile:
github "hackiftekhar/IQKeyboardManager"
Run carthage update --use-xcframeworks to build the frameworks and drag IQKeyboardManagerSwift.xcframework into your Xcode project based on your need. Make sure to add only one framework, not both.
Swift Package Manager (SPM)
To install IQKeyboardManagerSwift package via Xcode
- Go to File -> Swift Packages -> Add Package Dependency...
- Then search for https://github.com/hackiftekhar/IQKeyboardManager.git
- And choose the version you want
Source Code
IQKeyboardManagerSwift: Source code installation is not supported (since 7.2.0) because now the library depends on some other independent libraries. Due to this you may face compilation issues.
Basic Usage
Minimal Setup (Core Only)
In AppDelegate.swift, import and enable IQKeyboardManager:
import IQKeyboardManagerSwift

@UIApplicationMain
class AppDelegate: UIResponder, UIApplicationDelegate {

    var window: UIWindow?

    func application(_ application: UIApplication,
                     didFinishLaunchingWithOptions launchOptions: [UIApplication.LaunchOptionsKey: Any]?) -> Bool {

        // Enable keyboard management
        IQKeyboardManager.shared.isEnabled = true

        return true
    }
}
That's it! The keyboard will now automatically adjust to avoid covering text fields.
With Toolbar (Requires IQKeyboardToolbarManager Subspec)
import IQKeyboardManagerSwift

func application(_ application: UIApplication,
                 didFinishLaunchingWithOptions launchOptions: [UIApplication.LaunchOptionsKey: Any]?) -> Bool {

    // Enable keyboard management
    IQKeyboardManager.shared.isEnabled = true

    // Enable toolbar (@Deprecated: Please use IQKeyboardToolbarManager pod independently)
    IQKeyboardManager.shared.enableAutoToolbar = true

    return true
}
With All Features
import IQKeyboardManagerSwift

func application(_ application: UIApplication,
                 didFinishLaunchingWithOptions launchOptions: [UIApplication.LaunchOptionsKey: Any]?) -> Bool {

    // Core functionality
    IQKeyboardManager.shared.isEnabled = true
    IQKeyboardManager.shared.keyboardDistance = 20.0

    // Toolbar (if using IQKeyboardToolbarManager subspec)
    IQKeyboardManager.shared.enableAutoToolbar = true

    // Tap to resign (if using Resign subspec)
    IQKeyboardManager.shared.resignOnTouchOutside = true

    // Appearance (if using Appearance subspec)
    IQKeyboardManager.shared.keyboardConfiguration.overrideKeyboardAppearance = true
    IQKeyboardManager.shared.keyboardConfiguration.keyboardAppearance = .dark

    return true
}
Migration Guide
- IQKeyboardManager 2.0.0 Migration Guide
- IQKeyboardManager 3.0.0 Migration Guide
- IQKeyboardManager 4.0.0 Migration Guide
- IQKeyboardManager 5.0.0 Migration Guide
- IQKeyboardManager 6.0.0 Migration Guide
- IQKeyboardManager 7.0.0 Migration Guide
- IQKeyboardManager 8.0.0 Migration Guide
Other Links
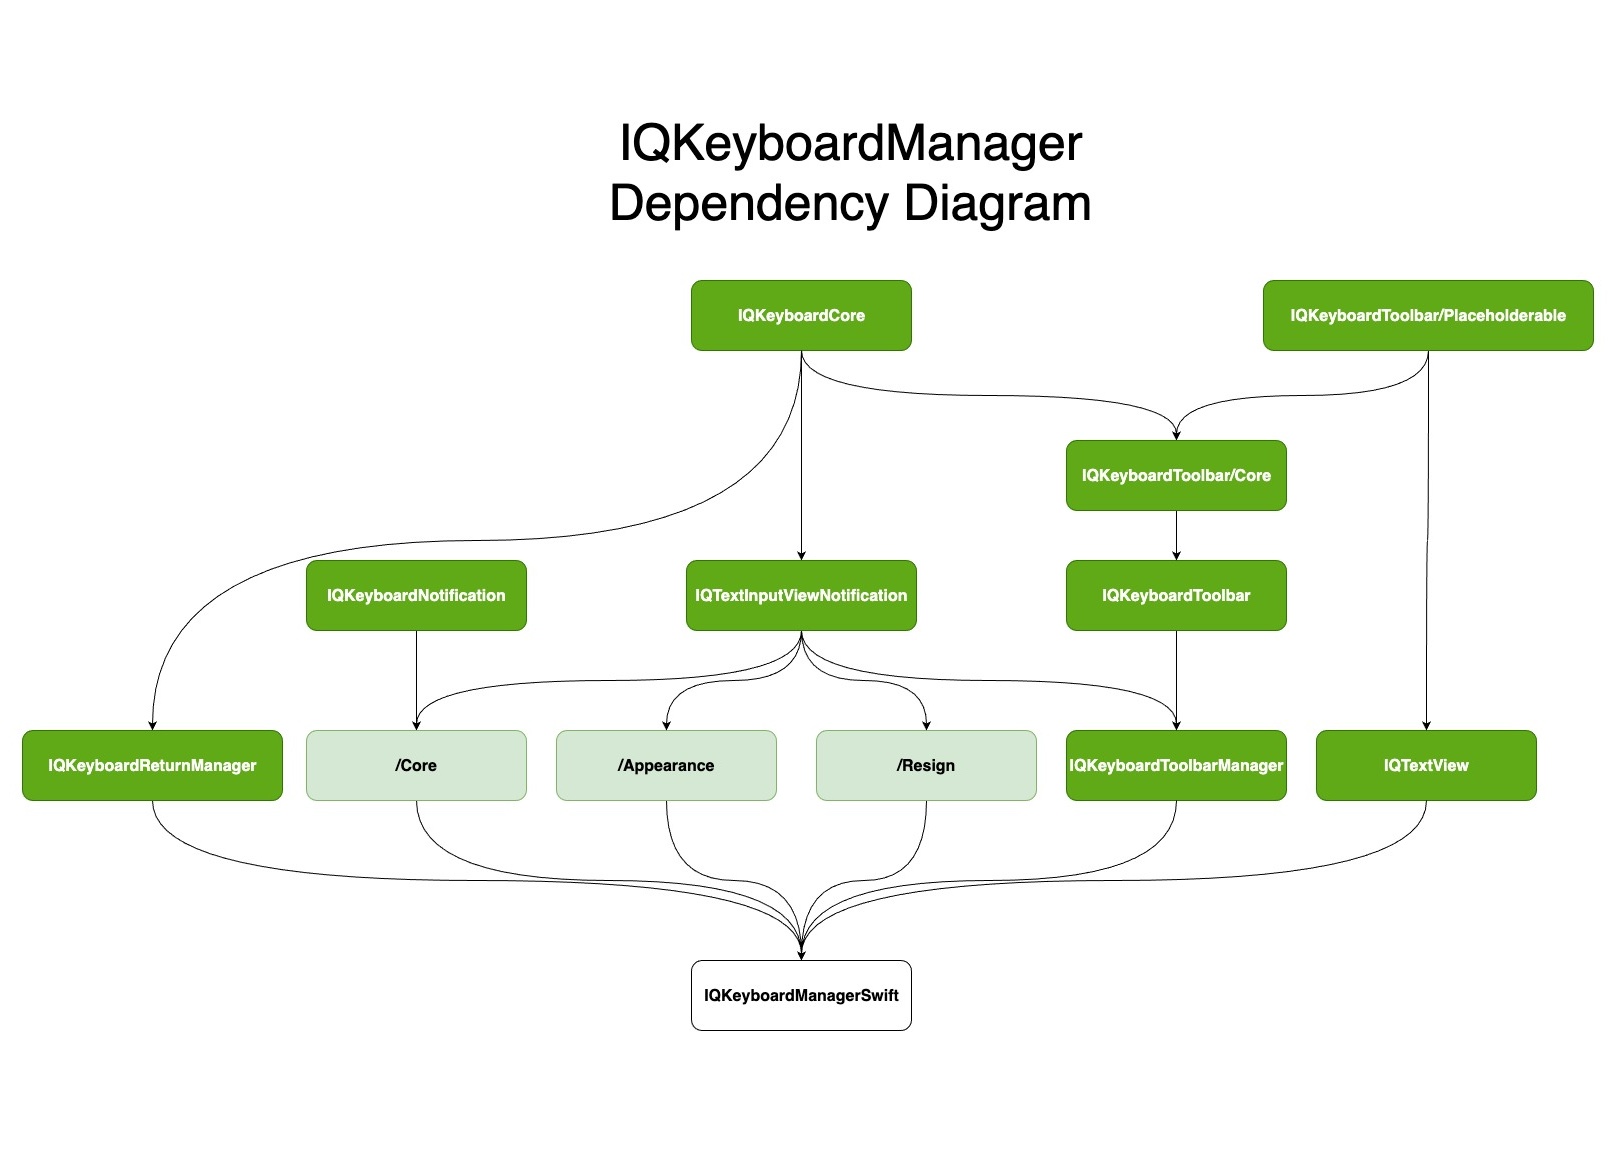
Dependency Diagram
LICENSE
Distributed under the MIT License.
Contributions
Any contribution is more than welcome! You can contribute through pull requests and issues on GitHub.
Author
If you wish to contact me, email at: hack.iftekhar@gmail.com
Top Related Projects
Swift image slideshow with circular scrolling, timer and full screen viewer
Reactive Keyboard in iOS
⛔️**DEPRECATED** ⛔️ A drop-in UIViewController subclass with a growing text input view and other useful messaging features
A collection of iOS components.
Create amazing custom iOS keyboards with Swift & SwiftUI.
A drop-in universal solution for moving text fields out of the way of the keyboard in iOS
Convert designs to code with AI
Introducing Visual Copilot: A new AI model to turn Figma designs to high quality code using your components.
Try Visual Copilot