 react-starter-kit
Modern React starter kit with Bun, TypeScript, Tailwind CSS, tRPC, Stripe, and Cloudflare Workers. Production-ready monorepo for building fast web apps.
Top Related Projects

Set up a modern web app by running one command.

The React Framework

React-based framework with performance, scalability, and security built in.
Develop. Preview. Ship.

RedwoodGraphQL

Next generation frontend tooling. It's fast!
Quick Overview
React Starter Kit is a comprehensive boilerplate for building web applications using React, Node.js, and GraphQL. It provides a solid foundation for developing isomorphic (universal) web apps with server-side rendering, code splitting, and a well-organized project structure.
Pros
- Includes a robust set of tools and best practices for modern web development
- Supports server-side rendering for improved performance and SEO
- Implements code splitting for optimized loading times
- Provides a well-structured project setup with clear separation of concerns
Cons
- Steep learning curve for developers new to React or GraphQL
- May be overkill for smaller projects or simple websites
- Requires regular maintenance to keep up with rapidly evolving dependencies
- Some users report issues with TypeScript integration
Getting Started
-
Clone the repository:
git clone https://github.com/kriasoft/react-starter-kit.git MyApp cd MyApp -
Install dependencies:
npm install -
Start the development server:
npm start -
Open your browser and navigate to
http://localhost:3000
For more detailed instructions and configuration options, refer to the project's README and documentation.
Competitor Comparisons
Set up a modern web app by running one command.
Pros of Create React App
- Simpler setup and configuration, ideal for beginners
- Official Facebook support and regular updates
- Extensive documentation and community resources
Cons of Create React App
- Less flexibility for advanced configurations
- Limited built-in features compared to React Starter Kit
- Potential for "ejecting" to gain more control, which can be complex
Code Comparison
React Starter Kit:
import React from 'react';
import Layout from '../../components/Layout';
import Home from './Home';

const title = 'React Starter Kit';
const component = () => (
  <Layout>
    <Home title={title} />
  </Layout>
);
Create React App:
import React from 'react';
import './App.css';

function App() {
  return (
    <div className="App">
      <header className="App-header">
        <p>Edit <code>src/App.js</code> and save to reload.</p>
      </header>
    </div>
  );
}
Summary
Create React App offers a streamlined setup process and is well-supported, making it ideal for beginners and quick prototyping. React Starter Kit provides more advanced features and flexibility out of the box, catering to developers who need more control over their project structure and configuration. The choice between the two depends on the project requirements and the developer's experience level.
The React Framework
Pros of Next.js
- Built-in server-side rendering and static site generation
- Automatic code splitting for faster page loads
- Simpler routing system with file-based routing
Cons of Next.js
- Less flexibility in project structure compared to React Starter Kit
- Steeper learning curve for developers new to server-side rendering
- More opinionated, which may not suit all project requirements
Code Comparison
React Starter Kit:
import React from 'react';
import Layout from '../../components/Layout';
import Home from './Home';

const HomePage = () => (
  <Layout>
    <Home />
  </Layout>
);

export default HomePage;
Next.js:
import Head from 'next/head';
import Layout from '../components/Layout';

export default function Home() {
  return (
    <Layout>
      <Head>
        <title>Home Page</title>
      </Head>
      <h1>Welcome to Next.js!</h1>
    </Layout>
  );
}
The code comparison shows that Next.js has a more streamlined approach to creating pages, with built-in features like the Head component for managing metadata. React Starter Kit, on the other hand, provides more flexibility in how components are structured and composed.
React-based framework with performance, scalability, and security built in.
Pros of Gatsby
- Built-in performance optimizations like code splitting and prefetching
- Large ecosystem of plugins for easy integration of various features
- Static site generation capabilities for improved SEO and load times
Cons of Gatsby
- Steeper learning curve due to GraphQL integration
- Potentially slower build times for large sites
- Less flexibility for complex, dynamic web applications
Code Comparison
React Starter Kit:
import React from 'react';
import Layout from './Layout';
import Home from './Home';

function App() {
  return (
    <Layout>
      <Home />
    </Layout>
  );
}
Gatsby:
import React from 'react';
import { Link } from 'gatsby';
import Layout from '../components/layout';

export default function Home() {
  return (
    <Layout>
      <h1>Welcome to Gatsby</h1>
      <Link to="/about/">About</Link>
    </Layout>
  );
}
The main difference in the code examples is Gatsby's use of its own Link component for internal navigation, which enables performance optimizations. React Starter Kit uses standard React components and routing.
Gatsby is more suited for static sites and content-heavy applications, while React Starter Kit offers more flexibility for complex, dynamic web applications. The choice between them depends on the specific project requirements and developer preferences.
Develop. Preview. Ship.
Pros of Vercel
- Comprehensive deployment platform with serverless functions and edge network
- Seamless integration with popular frameworks like Next.js and Nuxt.js
- Automatic HTTPS and custom domain support
Cons of Vercel
- Less flexibility for custom server-side configurations
- Potential vendor lock-in for certain features
- Limited control over infrastructure compared to self-hosted solutions
Code Comparison
React Starter Kit:
import React from 'react';
import { render } from 'react-dom';
import App from './components/App';

render(<App />, document.getElementById('root'));
Vercel:
module.exports = (req, res) => {
  res.json({
    message: 'Hello from Vercel Serverless Function!'
  });
};
Key Differences
React Starter Kit is a boilerplate for building isomorphic web applications with React, while Vercel is a cloud platform for static and serverless deployment. React Starter Kit focuses on providing a foundation for React-based projects, whereas Vercel offers a complete deployment and hosting solution for various frameworks and static sites.
React Starter Kit gives developers more control over the project structure and server-side rendering, making it suitable for complex applications. Vercel, on the other hand, simplifies deployment and scaling, making it ideal for projects that prioritize quick deployment and serverless architecture.
RedwoodGraphQL
Pros of GraphQL
- Full-stack framework with integrated GraphQL support
- Built-in CLI for scaffolding and code generation
- Opinionated structure promoting best practices
Cons of GraphQL
- Steeper learning curve for developers new to GraphQL
- Less flexibility in project structure compared to React Starter Kit
- Potentially overkill for smaller projects
Code Comparison
React Starter Kit:
import { graphql } from 'react-relay';

const query = graphql`
  query HomeQuery {
    me {
      id
      name
    }
  }
`;
GraphQL:
export const QUERY = gql`
  query FindUserById($id: Int!) {
    user: user(id: $id) {
      id
      name
    }
  }
`
Both repositories utilize GraphQL, but GraphQL provides a more integrated approach with its full-stack framework. React Starter Kit offers more flexibility but requires additional setup for GraphQL integration.
GraphQL's opinionated structure and built-in tools can accelerate development for larger projects, while React Starter Kit's flexibility may be preferable for customized setups or smaller applications.
The code snippets demonstrate similar GraphQL query structures, with GraphQL using a more standardized approach through its framework conventions.
Next generation frontend tooling. It's fast!
Pros of Vite
- Faster development server and build times due to native ES modules
- Simpler configuration and setup out of the box
- Supports multiple frameworks beyond React (Vue, Svelte, etc.)
Cons of Vite
- Less opinionated structure, which may require more setup for larger projects
- Smaller ecosystem of plugins compared to webpack-based solutions
- May require additional configuration for some advanced use cases
Code Comparison
React Starter Kit (webpack-based):
module.exports = {
  entry: './src/index.js',
  output: {
    path: path.resolve(__dirname, 'dist'),
    filename: 'bundle.js'
  },
  module: {
    rules: [
      { test: /\.js$/, use: 'babel-loader' }
    ]
  }
};
Vite:
export default {
  plugins: [react()],
  build: {
    outDir: 'dist',
    rollupOptions: {
      input: './src/main.jsx'
    }
  }
};
The Vite configuration is generally more concise and requires less boilerplate compared to webpack-based setups like React Starter Kit. Vite's approach leverages native ES modules, resulting in a simpler configuration file. However, React Starter Kit's webpack configuration offers more granular control over the build process, which can be beneficial for complex projects with specific requirements.
Convert  designs to code with AI
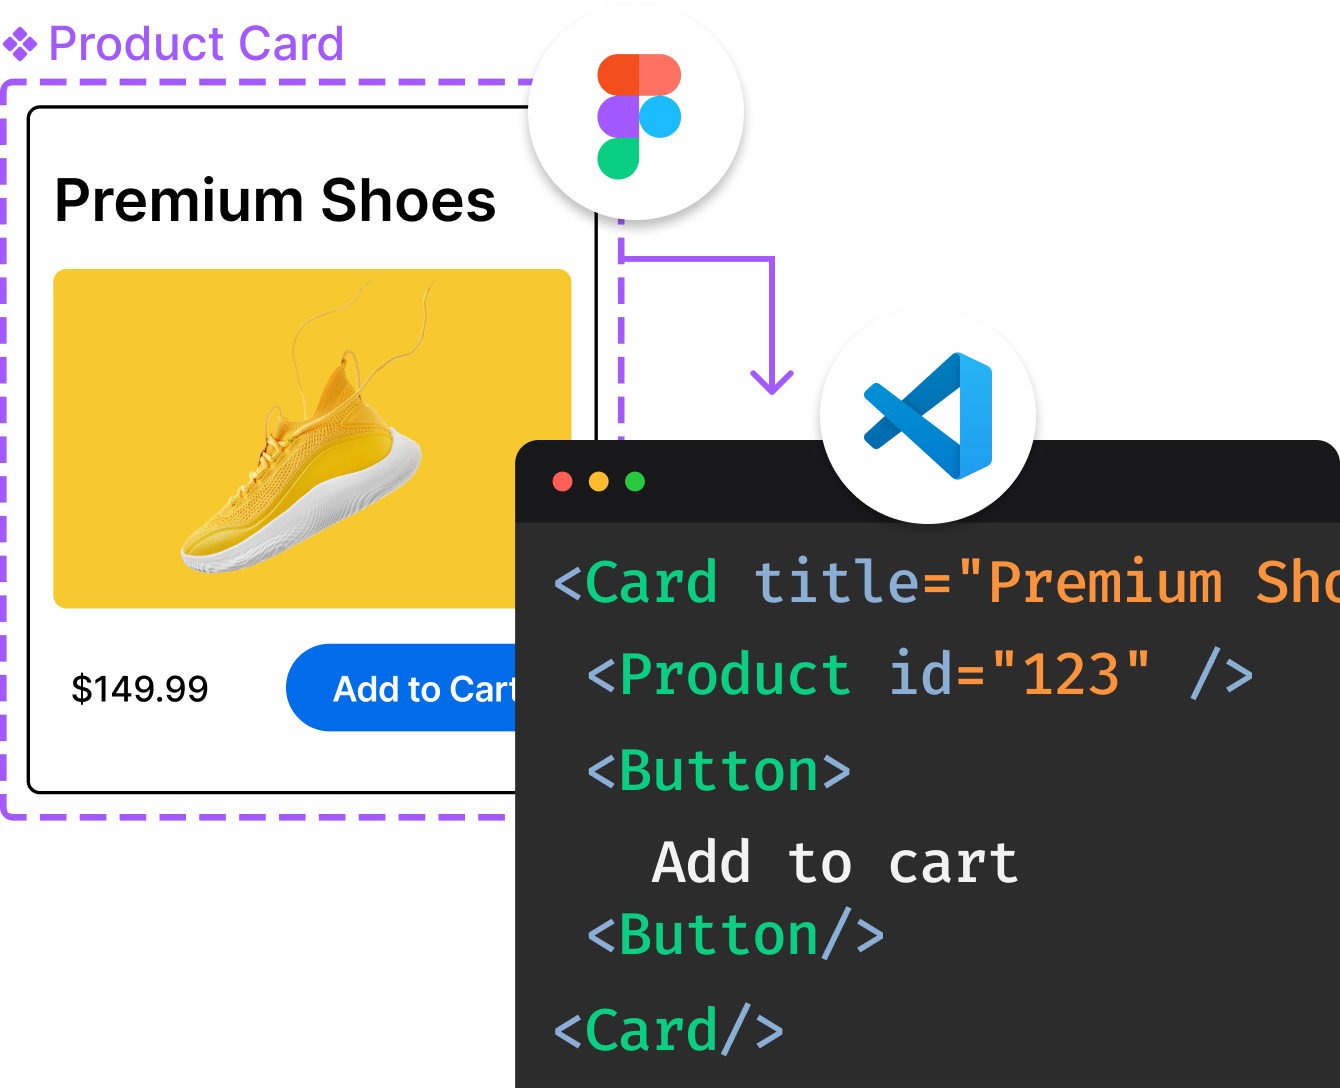
Introducing Visual Copilot: A new AI model to turn Figma designs to high quality code using your components.
Try Visual CopilotREADME
React Starter Kit


A full-stack monorepo template for building SaaS applications with React 19, tRPC, and Cloudflare Workers. Type-safe from database to UI, deployable to the edge in minutes.
Highlights
- Type-safe full stack â TypeScript, tRPC, and Drizzle ORM create a single type contract from database to UI
- Edge-native â Three Cloudflare Workers (web, app, api) connected via service bindings
- Auth + billing included â Better Auth with email OTP, passkey, Google OAuth, organizations, and Stripe subscriptions
- Modern React â React 19, TanStack Router (file-based), TanStack Query, Jotai, Tailwind CSS v4, shadcn/ui
- Database ready â Drizzle ORM with Neon PostgreSQL, migrations, and seed data
- Fast DX â Bun runtime, Vite, Vitest, ESLint, Prettier, and pre-configured VS Code settings
React Starter Kit is proudly supported by these amazing sponsors:



Technology Stack
| Layer | Technologies |
|---|---|
| Runtime | Bun, Cloudflare Workers, TypeScript 5.9 |
| Frontend | React 19, TanStack Router, Tailwind CSS v4, shadcn/ui, Jotai |
| Marketing | Astro |
| Backend | Hono, tRPC, Better Auth, Stripe |
| Database | Drizzle ORM, Neon PostgreSQL |
| Tooling | Vite, Vitest, ESLint, Prettier |
Monorepo Architecture
âââ apps/
â âââ web/ Astro marketing site (edge router, serves static + proxies to app/api)
â âââ app/ React 19 SPA (TanStack Router, Jotai, Tailwind CSS v4)
â âââ api/ Hono + tRPC API server (Better Auth, Cloudflare Workers)
â âââ email/ React Email templates
âââ packages/
â âââ ui/ shadcn/ui components (new-york style)
â âââ core/ Shared types and utilities
â âââ ws-protocol/ WebSocket protocol with type-safe messaging
âââ db/ Drizzle ORM schemas, migrations, and seed data
âââ infra/ Terraform (Cloudflare Workers, DNS, Hyperdrive)
âââ docs/ VitePress documentation
âââ scripts/ Build automation and dev tools
Each app deploys independently to Cloudflare Workers. The web worker routes /api/* to the API worker and app routes to the app worker via service bindings.
Prerequisites
- Bun v1.3+ (replaces Node.js and npm)
- VS Code with our recommended extensions
- React Developer Tools browser extension (recommended)
- Cloudflare account for deployment
Quick Start
1. Create Your Project
Generate a new repository from this template, then clone it locally:
git clone https://github.com/your-username/your-project-name.git
cd your-project-name
2. Install Dependencies
bun install
3. Configure Environment
This project follows Vite env conventions:
.envis committed and contains shared defaults/placeholders only (no real secrets).env.localis git-ignored and should contain your real credentials.env.localvalues override.env
cp .env .env.local # then replace placeholder values with real ones
Also check wrangler.jsonc for Worker configuration and bindings.
4. Start Development
# Launch all apps in development mode (web, api, and app)
bun dev

# Or, start specific apps individually
bun web:dev  # Marketing site
bun app:dev  # Main application
bun api:dev  # API server
5. Initialize Database
Ensure DATABASE_URL is configured in your .env.local file, then set up the schema:
bun db:push              # Push schema directly (quick dev setup)
bun db:seed              # Seed with sample data (optional)
bun db:studio            # Open database GUI
For production, use bun db:migrate to apply migrations instead of db:push.
| App | URL |
|---|---|
| React app | http://localhost:5173 |
| Marketing site | http://localhost:4321 |
| API server | http://localhost:8787 |
Production Deployment
1. Environment Setup
Configure your production secrets in Cloudflare Workers:
# Required secrets
bun wrangler secret put BETTER_AUTH_SECRET
# Stripe billing (optional â first 4 required to enable, annual is optional)
bun wrangler secret put STRIPE_SECRET_KEY
bun wrangler secret put STRIPE_WEBHOOK_SECRET
bun wrangler secret put STRIPE_STARTER_PRICE_ID
bun wrangler secret put STRIPE_PRO_PRICE_ID
bun wrangler secret put STRIPE_PRO_ANNUAL_PRICE_ID # optional
# OAuth providers (as needed)
bun wrangler secret put GOOGLE_CLIENT_ID
bun wrangler secret put GOOGLE_CLIENT_SECRET
# Email service
bun wrangler secret put RESEND_API_KEY
# AI features (optional)
bun wrangler secret put OPENAI_API_KEY
Run these commands from the target app directory or pass --config apps/<app>/wrangler.jsonc. Non-sensitive vars like RESEND_EMAIL_FROM go in wrangler.jsonc directly.
2. Build and Deploy
# Build packages that require compilation (order matters!)
bun email:build    # Build email templates first
bun web:build      # Build marketing site
bun app:build      # Build main React app

# Deploy all applications
bun web:deploy     # Deploy marketing site
bun api:deploy     # Deploy API server
bun app:deploy     # Deploy main React app
Backers








Contributors











Need Help?
Documentation covers auth, database, billing, deployment, and more.
Our AI assistant is trained on this codebase â ask it anything on ChatGPT or Gemini. Try these questions:
- How do I add a new tRPC endpoint?
- Help me create a database table
- How does authentication work?
- Explain the project structure
- How do I deploy to Cloudflare?
- Add a new page with routing
- How do I send emails?
Contributing
See the Contributing Guide to get started. Check good first issues or join Discord for discussion.
License
Copyright © 2014-present Kriasoft. This source code is licensed under the MIT license found in the LICENSE file.
Made with ⥠by Konstantin Tarkus (@koistya, blog) and contributors.
Top Related Projects
Set up a modern web app by running one command.
The React Framework
React-based framework with performance, scalability, and security built in.
Develop. Preview. Ship.
RedwoodGraphQL
Next generation frontend tooling. It's fast!
Convert designs to code with AI
Introducing Visual Copilot: A new AI model to turn Figma designs to high quality code using your components.
Try Visual Copilot