
Top Related Projects

Code repository of all OpenGL chapters from the book and its accompanying website https://learnopengl.com

Tiny but powerful single file wavefront obj loader

Dear ImGui: Bloat-free Graphical User interface for C++ with minimal dependencies

stb single-file public domain libraries for C/C++

Filament is a real-time physically based rendering engine for Android, iOS, Windows, Linux, macOS, and WebGL2

One stop solution for all Vulkan samples
Quick Overview
TinyRenderer is an educational project that implements a simple software renderer from scratch. It aims to teach the fundamentals of 3D graphics programming by building a basic rendering pipeline without relying on existing libraries like OpenGL or DirectX.
Pros
- Excellent learning resource for understanding 3D graphics concepts
- Step-by-step tutorials with clear explanations and code examples
- Minimal dependencies, making it easy to set up and run
- Encourages experimentation and modification of the renderer
Cons
- Not suitable for production use or high-performance rendering
- Limited feature set compared to professional rendering engines
- May require a solid understanding of C++ and linear algebra
- Documentation is primarily in the form of lessons, which may be challenging for quick reference
Code Examples
- Drawing a line using Bresenham's algorithm:
void line(int x0, int y0, int x1, int y1, TGAImage &image, TGAColor color) {
    bool steep = false;
    if (std::abs(x0-x1)<std::abs(y0-y1)) {
        std::swap(x0, y0);
        std::swap(x1, y1);
        steep = true;
    }
    if (x0>x1) {
        std::swap(x0, x1);
        std::swap(y0, y1);
    }
    int dx = x1-x0;
    int dy = y1-y0;
    int derror2 = std::abs(dy)*2;
    int error2 = 0;
    int y = y0;
    for (int x=x0; x<=x1; x++) {
        if (steep) {
            image.set(y, x, color);
        } else {
            image.set(x, y, color);
        }
        error2 += derror2;
        if (error2 > dx) {
            y += (y1>y0?1:-1);
            error2 -= dx*2;
        }
    }
}
- Implementing basic triangle rasterization:
void triangle(Vec2i t0, Vec2i t1, Vec2i t2, TGAImage &image, TGAColor color) {
    if (t0.y>t1.y) std::swap(t0, t1);
    if (t0.y>t2.y) std::swap(t0, t2);
    if (t1.y>t2.y) std::swap(t1, t2);
    int total_height = t2.y-t0.y;
    for (int i=0; i<total_height; i++) {
        bool second_half = i>t1.y-t0.y || t1.y==t0.y;
        int segment_height = second_half ? t2.y-t1.y : t1.y-t0.y;
        float alpha = (float)i/total_height;
        float beta  = (float)(i-(second_half ? t1.y-t0.y : 0))/segment_height;
        Vec2i A = t0 + (t2-t0)*alpha;
        Vec2i B = second_half ? t1 + (t2-t1)*beta : t0 + (t1-t0)*beta;
        if (A.x>B.x) std::swap(A, B);
        for (int j=A.x; j<=B.x; j++) {
            image.set(j, t0.y+i, color);
        }
    }
}
- Implementing basic vertex shader:
Vec3f vertex_shader(const vertex_t &v) {
    Vec4f gl_Vertex = embed<4>(v.position);
    gl_Vertex = Projection * ModelView * gl_Vertex;
    gl_Vertex = gl_Vertex / gl_Vertex[3];
    return proj<3>(gl_Vertex);
}
Getting Started
- Clone the repository:
git clone https
Competitor Comparisons
Code repository of all OpenGL chapters from the book and its accompanying website https://learnopengl.com
Pros of LearnOpenGL
- Comprehensive coverage of modern OpenGL techniques
- Extensive documentation and explanations for each concept
- Includes advanced topics like PBR and shadow mapping
Cons of LearnOpenGL
- Steeper learning curve for beginners
- Relies on external libraries, increasing complexity
- Less focus on fundamental graphics algorithms
Code Comparison
LearnOpenGL (using modern OpenGL):
glBindVertexArray(VAO);
glBindBuffer(GL_ARRAY_BUFFER, VBO);
glBufferData(GL_ARRAY_BUFFER, sizeof(vertices), vertices, GL_STATIC_DRAW);
glVertexAttribPointer(0, 3, GL_FLOAT, GL_FALSE, 3 * sizeof(float), (void*)0);
glEnableVertexAttribArray(0);
tinyrenderer (software rendering):
for (int y = t0.y; y <= t1.y; y++) {
    for (int x = t0.x; x <= t1.x; x++) {
        Vec3f bc_screen = barycentric(t0, t1, t2, Vec2i(x, y));
        if (bc_screen.x < 0 || bc_screen.y < 0 || bc_screen.z < 0) continue;
        image.set(x, y, color);
    }
}
LearnOpenGL focuses on using modern OpenGL APIs, while tinyrenderer implements rendering algorithms from scratch, providing a deeper understanding of graphics fundamentals.
Tiny but powerful single file wavefront obj loader
Pros of tinyobjloader
- Focused specifically on loading OBJ files, providing a more specialized and optimized solution
- Actively maintained with regular updates and contributions from the community
- Designed as a header-only library, making it easy to integrate into existing projects
Cons of tinyobjloader
- Limited to OBJ file format, while tinyrenderer covers a broader range of 3D rendering concepts
- Lacks the educational aspect and step-by-step tutorials provided by tinyrenderer
- May require additional code for rendering and visualization of loaded models
Code Comparison
tinyobjloader:
tinyobj::ObjReader reader;
reader.ParseFromFile("model.obj");
auto& attrib = reader.GetAttrib();
auto& shapes = reader.GetShapes();
tinyrenderer:
Model model("obj/african_head.obj");
TGAImage image(width, height, TGAImage::RGB);
render(model, image);
The tinyobjloader code focuses on loading OBJ files, while tinyrenderer demonstrates a complete rendering pipeline. tinyobjloader provides more detailed access to model attributes, whereas tinyrenderer abstracts the rendering process.
Dear ImGui: Bloat-free Graphical User interface for C++ with minimal dependencies
Pros of ImGui
- Provides a ready-to-use GUI library for immediate mode rendering
- Extensive documentation and examples for quick integration
- Cross-platform support with multiple backend options
Cons of ImGui
- Focused on GUI elements rather than low-level rendering techniques
- May have a steeper learning curve for those new to immediate mode GUIs
- Larger codebase and dependencies compared to TinyRenderer
Code Comparison
ImGui (C++):
ImGui::Begin("My Window");
ImGui::Text("Hello, world!");
if (ImGui::Button("Click me!"))
    doSomething();
ImGui::End();
TinyRenderer (C++):
Vec3f light_dir(0, 0, -1);
for (int i = 0; i < width * height; i++) {
    Vec3f n = model->normal(uv);
    float intensity = n * light_dir;
    image.set(x, y, TGAColor(intensity * 255, intensity * 255, intensity * 255, 255));
}
Summary
ImGui is a feature-rich GUI library for immediate mode rendering, offering cross-platform support and extensive documentation. It's ideal for quickly adding user interfaces to applications. TinyRenderer, on the other hand, is a minimalistic software renderer focused on teaching low-level graphics concepts. While ImGui provides ready-to-use GUI components, TinyRenderer offers a deeper understanding of rendering techniques through its simple implementation.
stb single-file public domain libraries for C/C++
Pros of stb
- Broader scope: Offers a collection of single-file libraries for various tasks, not limited to rendering
- More mature and widely used in production environments
- Designed for easy integration into existing projects
Cons of stb
- Less focused on educational purposes
- May require more effort to understand the entire codebase
- Not specifically tailored for learning computer graphics concepts
Code Comparison
tinyrenderer:
Vec3f barycentric(Vec2i *pts, Vec2i P) {
    Vec3f u = cross(Vec3f(pts[2][0]-pts[0][0], pts[1][0]-pts[0][0], pts[0][0]-P[0]),
                    Vec3f(pts[2][1]-pts[0][1], pts[1][1]-pts[0][1], pts[0][1]-P[1]));
    return Vec3f(1.f-(u.x+u.y)/u.z, u.y/u.z, u.x/u.z);
}
stb:
int stbi_write_png(char const *filename, int w, int h, int comp, const void *data, int stride_in_bytes)
{
   FILE *f;
   int i,j,k,padding,psize;
   stbi__write_context s;
The code snippets demonstrate the different focus of each project. tinyrenderer shows a specific graphics algorithm implementation, while stb provides a more general-purpose image writing function.
Filament is a real-time physically based rendering engine for Android, iOS, Windows, Linux, macOS, and WebGL2
Pros of Filament
- More comprehensive and production-ready rendering engine
- Supports multiple platforms (Android, iOS, Windows, macOS, Linux)
- Offers advanced features like physically-based rendering and image-based lighting
Cons of Filament
- Steeper learning curve due to its complexity
- Larger codebase, which may be overwhelming for beginners
- Less focused on educational purposes compared to Tinyrenderer
Code Comparison
Tinyrenderer (basic triangle rasterization):
void triangle(Vec2i t0, Vec2i t1, Vec2i t2, TGAImage &image, TGAColor color) {
    if (t0.y > t1.y) std::swap(t0, t1);
    if (t0.y > t2.y) std::swap(t0, t2);
    if (t1.y > t2.y) std::swap(t1, t2);
    line(t0, t1, image, color);
    line(t1, t2, image, color);
    line(t2, t0, image, color);
}
Filament (material definition):
material {
    name : "Basic",
    parameters : [
        { type : float3, name : "baseColor" }
    ],
    requires : [
        uv0
    ],
    shadingModel : unlit,
    culling : none
}
The code snippets highlight the difference in complexity and focus between the two projects. Tinyrenderer provides a simple implementation for educational purposes, while Filament offers a more sophisticated material system for production use.
One stop solution for all Vulkan samples
Pros of Vulkan-Samples
- Comprehensive showcase of Vulkan API features and best practices
- Regularly updated with new samples and improvements
- Backed by Khronos Group, ensuring high-quality and industry-standard examples
Cons of Vulkan-Samples
- Steeper learning curve due to Vulkan's complexity
- Requires more setup and boilerplate code
- May be overwhelming for beginners in computer graphics
Code Comparison
Vulkan-Samples (initialization):
VkInstanceCreateInfo create_info = {};
create_info.sType = VK_STRUCTURE_TYPE_INSTANCE_CREATE_INFO;
create_info.pApplicationInfo = &app_info;
VkResult result = vkCreateInstance(&create_info, nullptr, &instance);
tinyrenderer (initialization):
TGAImage image(width, height, TGAImage::RGB);
Model model("obj/african_head.obj");
Vec3f light_dir(0, 0, -1);
Vulkan-Samples offers a more comprehensive and industry-standard approach to graphics programming, while tinyrenderer provides a simpler, educational introduction to 3D rendering concepts. The code comparison illustrates the difference in complexity, with Vulkan-Samples requiring more setup and API-specific calls.
Convert  designs to code with AI

Introducing Visual Copilot: A new AI model to turn Figma designs to high quality code using your components.
Try Visual CopilotREADME
Software rendering in 500 lines of bare C++
The code itself is of little interest. Check the course notes:
- Introduction
- Bresenhamâs line drawing algorithm
- Triangle rasterization
- Primer on barycentric coordinates
- Hidden faces removal
- A crude (but simple) approach to camera handling
- Better camera handling
- Shading
- More data!
- Tangent space normal mapping
- Shadow mapping
- Indirect lighting
- Bonus: toon shading
- Afterword
In this series of articles, I aim to demonstrate how OpenGL, Vulkan, Metal, and DirectX work by writing a simplified clone from scratch. Surprisingly, many people struggle with the initial hurdle of learning a 3D graphics API. To help with this, I have prepared a short series of lectures, after which my students are able to produce quite capable renderers.
The task is as follows: using no third-party libraries (especially graphics-related ones), we will generate an image like this:
Warning: This is a training material that loosely follows the structure of modern 3D graphics libraries. It is a software renderer. I do not intend to show how to write GPU applications â I want to show how they work. I firmly believe that understanding this is essential for writing efficient applications using 3D libraries.
The starting point
The final code consists of about 500 lines. My students typically require 10 to 20 hours of programming to start producing such renderers. The input is a 3D model composed of a triangulated mesh and textures. The output is a rendereding. There is no graphical interface, the program simply generates an image.
To minimize external dependencies, I provide my students with a single class for handling TGA files â one of the simplest formats supporting RGB, RGBA, and grayscale images. This serves as our foundation for image manipulation. At the beginning, the only available functionality (besides loading and saving images) is the ability to set the color of a single pixel.
There are no built-in functions for drawing line segments or triangles â we will implement all of this manually. While I provide my own source code, written alongside my students, I do not recommend using it directly, as doing the work yourself is essential to understanding the concepts. The complete code is available on github, and you can find the initial source code I provide to my students here. Behold, here is the starting point:
#include "tgaimage.h"

constexpr TGAColor white   = {255, 255, 255, 255}; // attention, BGRA order
constexpr TGAColor green   = {  0, 255,   0, 255};
constexpr TGAColor red     = {  0,   0, 255, 255};
constexpr TGAColor blue    = {255, 128,  64, 255};
constexpr TGAColor yellow  = {  0, 200, 255, 255};

int main(int argc, char** argv) {
    constexpr int width  = 64;
    constexpr int height = 64;
    TGAImage framebuffer(width, height, TGAImage::RGB);

    int ax =  7, ay =  3;
    int bx = 12, by = 37;
    int cx = 62, cy = 53;

    framebuffer.set(ax, ay, white);
    framebuffer.set(bx, by, white);
    framebuffer.set(cx, cy, white);

    framebuffer.write_tga_file("framebuffer.tga");
    return 0;
}
It produces the 64x64 image framebuffer.tga, here I scaled it for better readability:
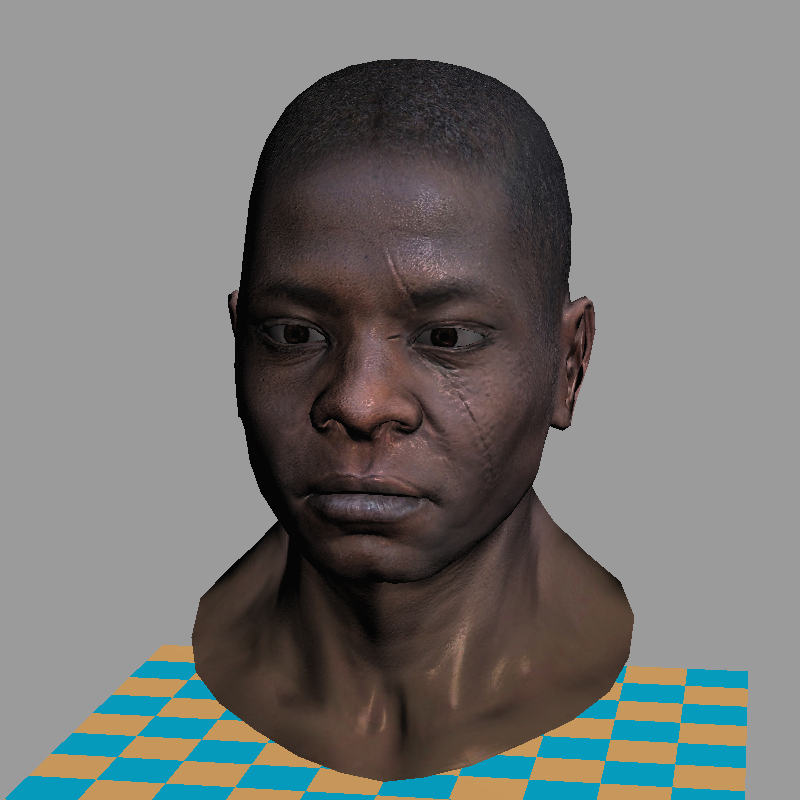
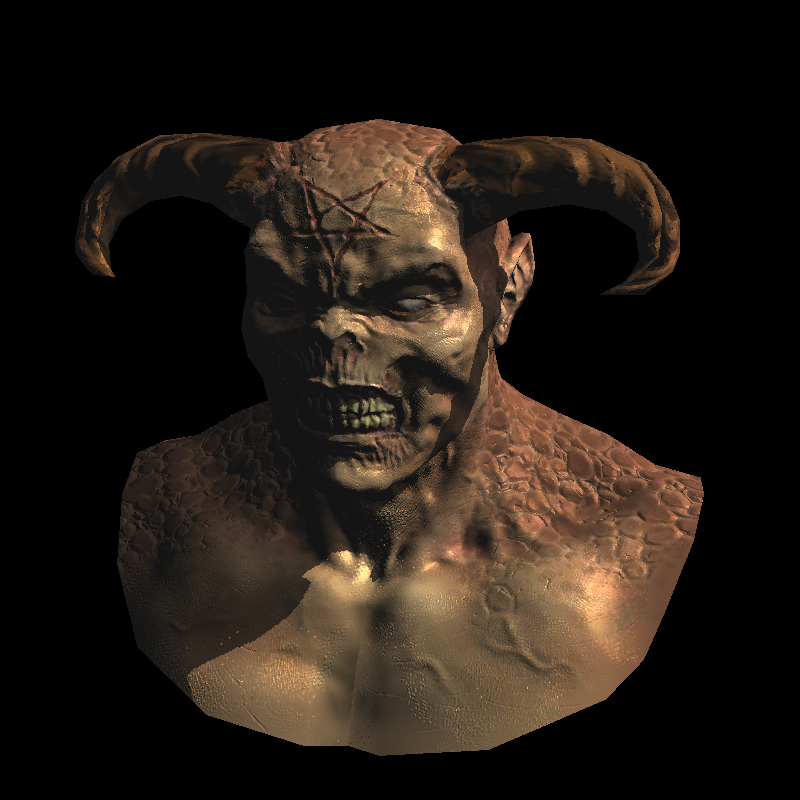
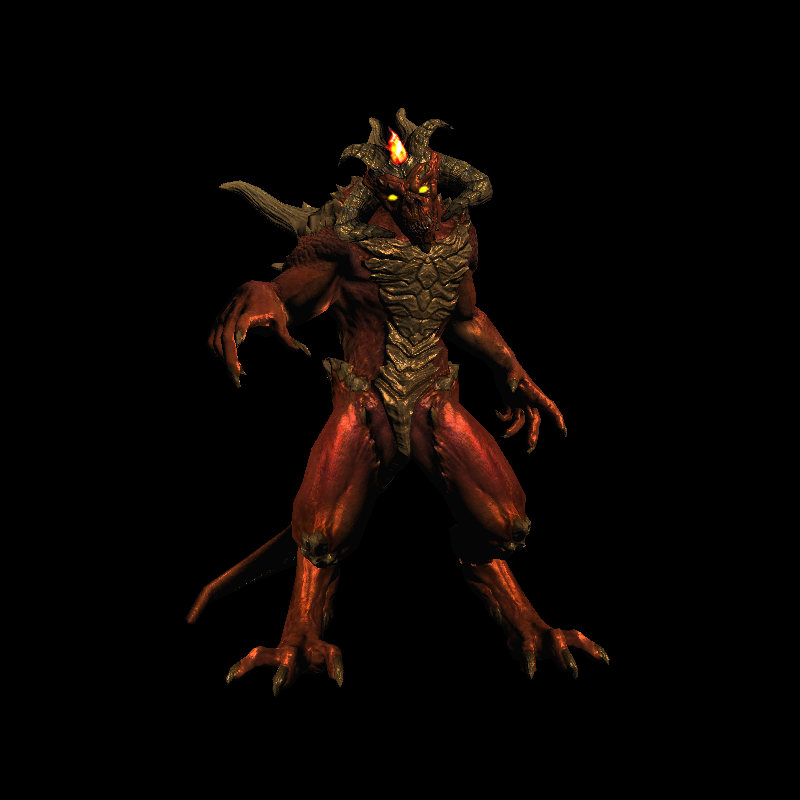
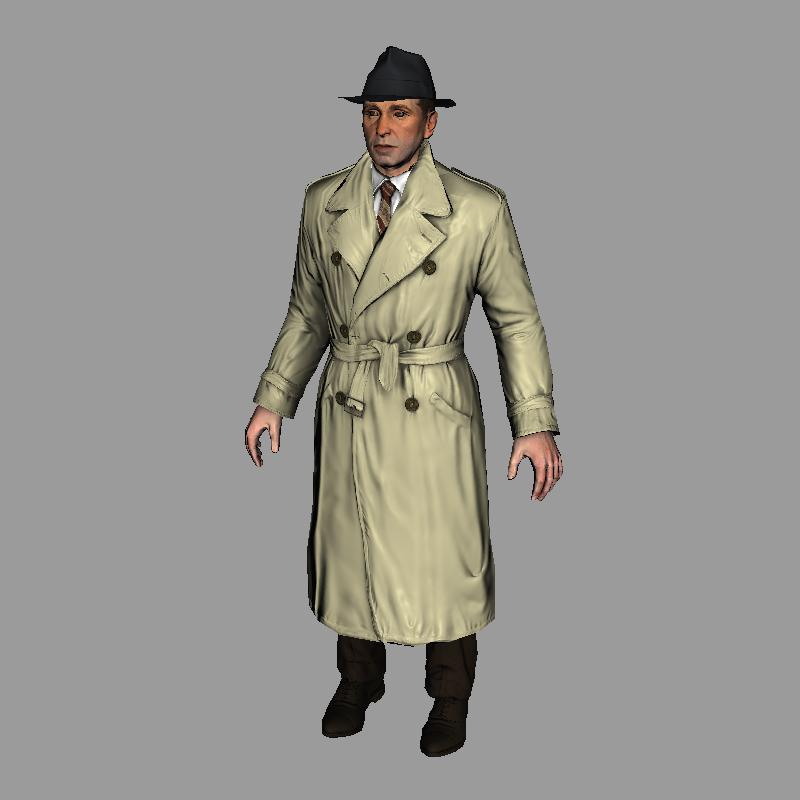
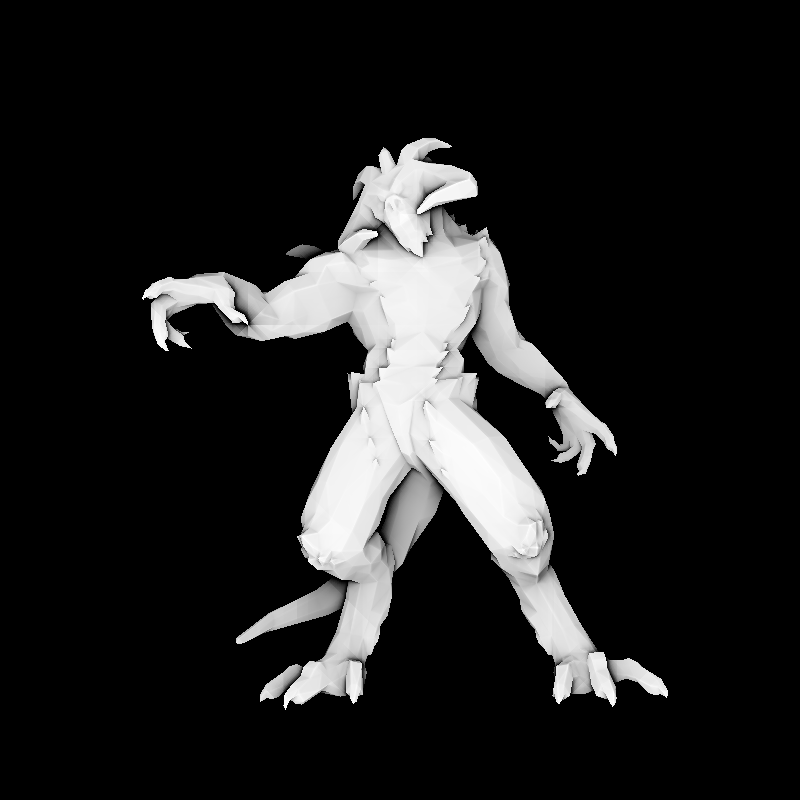
Teaser: few examples made with the renderer
Compilation
git clone https://github.com/ssloy/tinyrenderer.git &&
cd tinyrenderer &&
cmake -Bbuild &&
cmake --build build -j &&
build/tinyrenderer obj/diablo3_pose/diablo3_pose.obj obj/floor.obj
The rendered image is saved to framebuffer.tga.
Top Related Projects
Code repository of all OpenGL chapters from the book and its accompanying website https://learnopengl.com
Tiny but powerful single file wavefront obj loader
Dear ImGui: Bloat-free Graphical User interface for C++ with minimal dependencies
stb single-file public domain libraries for C/C++
Filament is a real-time physically based rendering engine for Android, iOS, Windows, Linux, macOS, and WebGL2
One stop solution for all Vulkan samples
Convert designs to code with AI
Introducing Visual Copilot: A new AI model to turn Figma designs to high quality code using your components.
Try Visual Copilot