
Top Related Projects
An open source visual editor for the 'MapLibre Style Specification'

Interactive, thoroughly customizable maps in the browser, powered by vector tiles and WebGL

OpenMapTiles Vector Tile Schema Implementation

Vector and raster maps with GL styles. Server side rendering by MapLibre GL Native. Map tile server for MapLibre GL JS, Android, iOS, Leaflet, OpenLayers, GIS via WMTS, etc.
Quick Overview
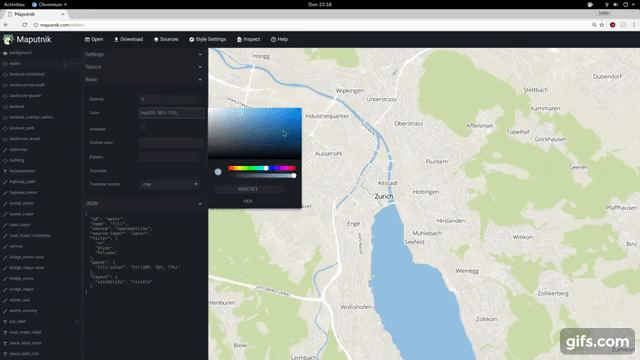
Maputnik is an open-source visual editor for creating and editing map styles compatible with Mapbox GL JS, MapLibre GL JS, and other mapping libraries. It provides a user-friendly interface for designing custom map styles without the need for coding, making it accessible to both developers and designers.
Pros
- User-friendly interface for creating and editing map styles visually
- Compatible with multiple mapping libraries, including Mapbox GL JS and MapLibre GL JS
- Open-source and free to use
- Supports both online and offline usage
Cons
- Limited advanced features compared to professional mapping software
- May require some learning curve for users new to map styling concepts
- Occasional bugs and performance issues reported by users
- Limited documentation for advanced use cases
Getting Started
To use Maputnik, follow these steps:
- Visit the Maputnik Editor online at https://maputnik.github.io/editor/
- Click on "New Style" to start a new map style or "Open" to load an existing style
- Use the left sidebar to add and edit layers, sources, and other style properties
- Preview your changes in real-time on the map view
- When finished, click "Export" to save your map style as a JSON file
For local installation:
# Clone the repository
git clone https://github.com/maplibre/maputnik.git

# Navigate to the project directory
cd maputnik

# Install dependencies
npm install

# Start the development server
npm start
This will launch Maputnik on your local machine, typically accessible at http://localhost:8888.
Competitor Comparisons
An open source visual editor for the 'MapLibre Style Specification'
Pros of Maputnik
- More active development and frequent updates
- Larger community and contributor base
- Better documentation and user guides
Cons of Maputnik
- Potentially less stable due to frequent changes
- May have a steeper learning curve for new users
- Larger codebase, which could lead to more complex maintenance
Code Comparison
Maputnik:
import React from 'react'
import MapboxGl from 'mapbox-gl'
import MapboxInspect from 'mapbox-gl-inspect'
import diffStyles from '@mapbox/mapbox-gl-style-spec/diff'
import { loadStyle, LatLng } from '../libs/style'
import { StyleStore } from '../libs/stylestore'
Maputnik>:
import React from 'react'
import MapboxGl from 'mapbox-gl'
import MapboxInspect from 'mapbox-gl-inspect'
import diffStyles from '@mapbox/mapbox-gl-style-spec/diff'
import { loadStyle, LatLng } from '../libs/style'
import { StyleStore } from '../libs/stylestore'
The code comparison shows that both repositories have similar import statements, indicating they likely share a common codebase or structure. This suggests that Maputnik> may be a fork or older version of Maputnik, with potential differences in implementation details or features not visible in this snippet.
Pros of Mapbox Studio Classic
- More comprehensive styling options and advanced features
- Tighter integration with Mapbox ecosystem and services
- Better support for complex data-driven styling
Cons of Mapbox Studio Classic
- Closed-source and requires a Mapbox account
- Less frequently updated and maintained
- Limited customization options for the editor interface
Code Comparison
Mapbox Studio Classic (CartoCSS):
#layer {
  polygon-fill: #1e90ff;
  line-color: #ffffff;
  line-width: 2;
  [zoom >= 12] { line-width: 3; }
}
Maputnik (JSON):
{
  "id": "layer",
  "type": "fill",
  "paint": {
    "fill-color": "#1e90ff",
    "fill-outline-color": "#ffffff"
  },
  "layout": {}
}
The code comparison shows the difference in styling syntax between Mapbox Studio Classic (using CartoCSS) and Maputnik (using JSON). Mapbox Studio Classic offers more concise and familiar CSS-like syntax, while Maputnik uses JSON structure, which aligns with the Mapbox GL JS specification.
Maputnik provides an open-source alternative to Mapbox Studio Classic, offering a more accessible and customizable map style editor. It supports various map providers and can be self-hosted, making it a flexible choice for developers who prefer open-source solutions or want to avoid vendor lock-in.
Interactive, thoroughly customizable maps in the browser, powered by vector tiles and WebGL
Pros of Mapbox GL JS
- More comprehensive and feature-rich mapping library
- Extensive documentation and community support
- Advanced performance optimizations for large datasets
Cons of Mapbox GL JS
- Proprietary license with usage restrictions
- Requires Mapbox access token for full functionality
- Less customizable styling options compared to Maputnik
Code Comparison
Mapbox GL JS:
mapboxgl.accessToken = 'YOUR_ACCESS_TOKEN';
const map = new mapboxgl.Map({
    container: 'map',
    style: 'mapbox://styles/mapbox/streets-v11'
});
Maputnik:
const map = new maplibregl.Map({
    container: 'map',
    style: 'https://demotiles.maplibre.org/style.json'
});
The main difference in the code snippets is that Mapbox GL JS requires an access token and uses Mapbox-hosted styles, while Maputnik (using MapLibre GL) doesn't require a token and can use any compatible style URL.
Mapbox GL JS offers a more robust set of features and optimizations, making it suitable for complex mapping applications. However, it comes with licensing restrictions and potential costs. Maputnik, built on MapLibre GL, provides an open-source alternative with greater flexibility in styling and customization, but may lack some advanced features and optimizations found in Mapbox GL JS.
OpenMapTiles Vector Tile Schema Implementation
Pros of OpenMapTiles
- Comprehensive solution for creating and hosting vector tiles
- Supports multiple data sources and customizable map styles
- Scalable and optimized for performance with large datasets
Cons of OpenMapTiles
- Steeper learning curve due to its complexity
- Requires more system resources for processing and hosting
- Less focus on visual editing of map styles
Code Comparison
OpenMapTiles (SQL query for water layer):
SELECT geometry, name, class, intermittent
FROM water_polygons
WHERE geometry && !bbox!
Maputnik (JSON style for water layer):
{
  "id": "water",
  "type": "fill",
  "source": "openmaptiles",
  "source-layer": "water",
  "paint": {
    "fill-color": "#a0cfdf"
  }
}
Summary
OpenMapTiles is a comprehensive solution for creating and hosting vector tiles, offering support for multiple data sources and customizable map styles. It's scalable and optimized for large datasets. However, it has a steeper learning curve and requires more system resources compared to Maputnik.
Maputnik, on the other hand, is primarily focused on visual editing of map styles and is more user-friendly for style creation. It doesn't provide the same level of data processing and tile generation capabilities as OpenMapTiles but offers a more accessible interface for style editing.
The code comparison shows that OpenMapTiles deals with raw data queries, while Maputnik focuses on style definitions for rendering map layers.
Vector and raster maps with GL styles. Server side rendering by MapLibre GL Native. Map tile server for MapLibre GL JS, Android, iOS, Leaflet, OpenLayers, GIS via WMTS, etc.
Pros of tileserver-gl
- Focused on serving vector and raster tiles, making it more specialized for tile delivery
- Supports multiple data sources, including MBTiles and GeoJSON
- Includes a built-in map viewer for easy visualization of served tiles
Cons of tileserver-gl
- Limited styling capabilities compared to Maputnik's visual style editor
- Less flexibility in customizing the overall map appearance
- Primarily designed for serving tiles, not for creating or editing map styles
Code Comparison
Maputnik (React component for style editing):
<StyleEditor
  style={this.state.mapStyle}
  onChange={this.onStyleChanged}
  onLayerIdChange={this.onLayerIdChange}
  onLayerVisibilityChange={this.onLayerVisibilityChange}
/>
tileserver-gl (Configuration for serving tiles):
{
  "options": {
    "paths": {
      "root": "/data",
      "fonts": "fonts",
      "styles": "styles",
      "mbtiles": "/data/mbtiles"
    }
  },
  "styles": {
    "basic": {
      "style": "basic.json",
      "tilejson": {
        "bounds": [-180, -85.0511, 180, 85.0511]
      }
    }
  }
}
Convert  designs to code with AI

Introducing Visual Copilot: A new AI model to turn Figma designs to high quality code using your components.
Try Visual CopilotREADME
Maputnik
![]()
![]()
A free and open visual editor for the MapLibre GL styles targeted at developers and map designers.
Usage
- :link: Design your maps online at https://www.maplibre.org/maputnik/ (all in local storage)
- :link: Use the Maputnik CLI for local style development
- In a Docker, run this command and browse to http://localhost:8888, Ctrl+C to stop the server.
docker run -it --rm -p 8888:80 ghcr.io/maplibre/maputnik:main
Documentation
The documentation can be found in the Wiki. You are welcome to collaborate!
- :link: Study the Maputnik Wiki
- :video_camera: Design a map from Scratch https://youtu.be/XoDh0gEnBQo
Develop
Maputnik is written in typescript and is using React and MapLibre GL JS.
We ensure building and developing Maputnik works with the current active LTS Node.js version and above.
Check out our Internationalization guide for UI text related changes.
Getting Involved
Join the #maplibre or #maputnik slack channel at OSMUS: get an invite at https://slack.openstreetmap.us/ Read the the below guide in order to get familiar with how we do things around here.
Install the deps, start the dev server and open the web browser on http://localhost:8888/.
# install dependencies
npm install
# start dev server
npm run start
If you want Maputnik to be accessible externally use the --host option:
# start externally accessible dev server
npm run start -- --host 0.0.0.0
The build process will watch for changes to the filesystem, rebuild and autoreload the editor.
npm run build
Lint the JavaScript code.
# run linter
npm run lint
npm run lint-css
npm run sort-styles
Tests
For E2E testing we use Cypress
Cypress doesn't start a server so you'll need to start one manually by running npm run start.
Now open a terminal and run the following using chrome:
npm run test
or firefox:
npm run test -- --browser firefox
See the following docs for more info: (Launching Browsers)[https://docs.cypress.io/guides/guides/launching-browsers]
You can also see the tests as they run or select which suites to run by executing:
npm run cy:open
Release process
- Review
CHANGELOG.md- Double-check that all changes included in the release are appropriately documented.
- To-be-released changes should be under the "main" header.
- Commit any final changes to the changelog.
- Run Create bump version PR by manual workflow dispatch and set the version number in the input. This will create a PR that changes the changelog and
package.jsonfile to review and merge. - Once merged, an automatic process will kick in and creates a GitHub release and uploads release assets.
Sponsors
Thanks to the supporters of the Kickstarter campaign. This project would not be possible without these commercial and individual sponsors. You can see this file's history for previous sponsors of the original Maputnik repo. Read more about the MapLibre Sponsorship Program at https://maplibre.org/sponsors/.
License
Maputnik is licensed under MIT and is Copyright (c) Lukas Martinelli and Maplibre contributors. As contributor please take extra care of not violating any Mapbox trademarks. Do not get inspired by other map studios and make your own decisions for a good style editor.
Top Related Projects
An open source visual editor for the 'MapLibre Style Specification'
Interactive, thoroughly customizable maps in the browser, powered by vector tiles and WebGL
OpenMapTiles Vector Tile Schema Implementation
Vector and raster maps with GL styles. Server side rendering by MapLibre GL Native. Map tile server for MapLibre GL JS, Android, iOS, Leaflet, OpenLayers, GIS via WMTS, etc.
Convert designs to code with AI
Introducing Visual Copilot: A new AI model to turn Figma designs to high quality code using your components.
Try Visual Copilot